

The Complete Glute Band Workout Guide for Real Results
Here’s a ready-to-go glute band workout you can start right now: place a fabric booty band just above your knees, then complete banded glute bridges (3 sets × 15 reps), lateral band walks (3 sets × 12 steps each direction), banded clamshells (3 sets × 15 reps per side), and standing kickbacks (3 sets × 12 reps per side). Rest 30–45 seconds between sets. Total time: roughly 20 minutes. All you need is one medium-resistance fabric band and a mat.
For tempo, move at a 2-second lift, 1-second squeeze at the top, and 2-second lower. That controlled pace is what separates a glute workout from a momentum workout. Before you start, do 10 bodyweight squats and 10 hip circles per side to wake up the hip joint.
Key Takeaways
Consistent band glute training, two to three sessions per week using hip thrusts, bridges, and lateral work, builds activation, stability, and measurable strength within 6–12 weeks.
| Point | Details |
|---|---|
| Start with fabric bands | Fabric booty bands grip better and stay in place during bridges and lateral walks. |
| Hip thrusts and bridges first | EMG evidence shows these two moves produce the highest gluteus maximus recruitment. |
| Progress in three phases | Move from activation (light band, form focus) to strength to overload over 9+ weeks. |
| Bands match weights for beginners | Clinical reviews show elastic resistance can produce comparable strength gains in some populations. |
| Dietexerciseshop starter kit | Resistance bands, strength bands, and eBooks from Dietexerciseshop cover every template in this guide. |
Table of Contents
- What is a glute band workout and why does it work?
- How do you choose the right band and where do you place it?
- The best banded glute exercises with step-by-step cues
- Three complete band-only workouts: beginner to advanced
- How do you progress a band glute workout over time?
- What are the red flags and common mistakes to fix?
- What does the evidence say about hip thrusts and band training?
- What should you realistically expect from band glute training?
- Build your starter kit with Dietexerciseshop
- Sources
- FAQ
What is a glute band workout and why does it work?
A glute band workout uses a looped resistance band placed around the legs or hips to add tension to glute-focused movements, forcing the gluteus maximus, medius, and minimus to fire harder than they would with bodyweight alone.
Primary muscles targeted:
- Gluteus maximus (hip extension, posterior chain power)
- Gluteus medius (hip abduction, lateral stability)
- Gluteus minimus (internal rotation, pelvic control)
- Secondary: hamstrings, hip flexors, adductors, core stabilizers
Why banded training delivers:
- Bands create accommodating resistance, meaning tension increases as you reach the hardest part of the movement, exactly where your glutes need the most challenge
- Elastic resistance can be comparable to free weights for producing strength gains in some populations, making bands a legitimate training tool rather than a warm-up prop
- Glute activation work with bands directly improves hip stability, which carries over to squats, deadlifts, and banded hip thrusts
- No gym required: a single band fits in a jacket pocket, making this the most portable lower-body training tool available
EMG research consistently shows that hip-extension movements like bridges and hip thrusts produce high gluteus maximus recruitment, and adding a band increases medius activation during lateral and abduction patterns. That combination, strength plus stability, is what makes a resistance band glute workout more than just a burnout circuit.
How do you choose the right band and where do you place it?
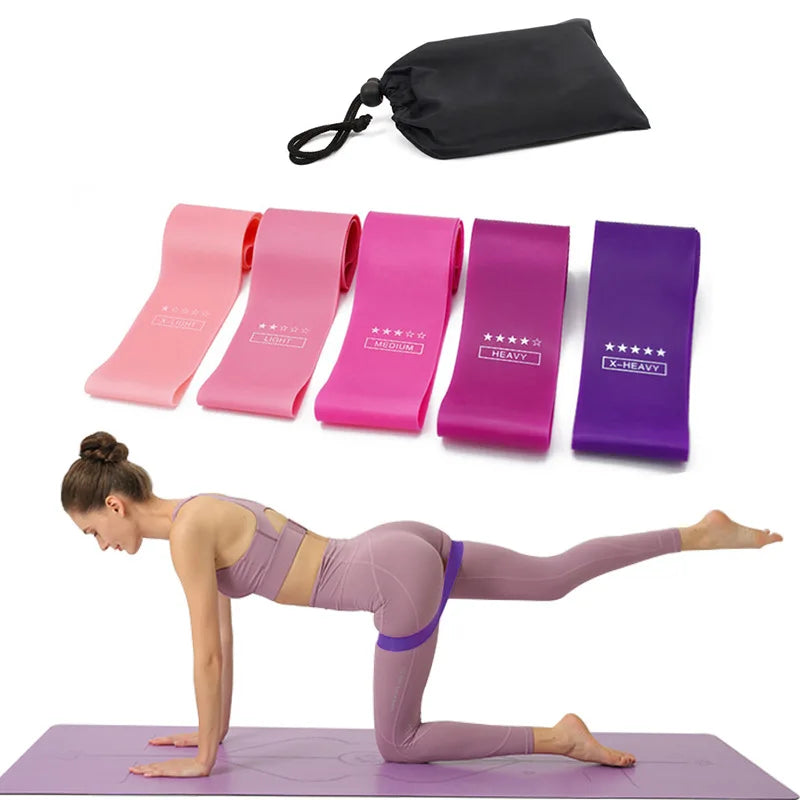
Start with a fabric booty band for most glute work. That’s the short answer. Fabric grips skin and clothing without rolling mid-set, which is the single biggest practical advantage for at-home training. Fabric booty bands, micro bands, and 1M power bands each serve different roles: fabric for lateral and bridge work, latex micro bands for activation and rehab-style moves, and longer power bands for heavy banded hip thrusts anchored to a barbell or rack.
| Band Type | Best For | Pros | Watch Out For |
|---|---|---|---|
| Fabric booty band | Bridges, lateral walks, clamshells | Stays in place, comfortable on skin | Less stretch range than latex |
| Latex mini/micro band | Activation, clamshells, fire hydrants | High elasticity, portable | Rolls on bare skin, snaps if overstretched |
| 1M power band (loop) | Banded hip thrusts, RDLs, pull-throughs | Heavy resistance, versatile | Bulkier, needs anchor point for some moves |
Testing your resistance level: if you can complete 15 clean reps with full range of motion and a controlled tempo, the band is too light. If you lose form by rep 8, drop to a lighter resistance. The right band lets you hit 10–12 quality reps before form starts to slip.
Placement guide:
- Above the knees: the default for bridges, squats, and lateral walks; activates medius strongly
- Mid-thigh: reduces leverage slightly, useful for beginners or those with knee sensitivity
- Ankles: increases difficulty for kickbacks and fire hydrants; demands more hip stability
- Across hips (power band): for banded hip thrusts with a barbell or heavy anchor
Avoid placing any band directly on the knee joint. That position concentrates pressure on the joint capsule rather than loading the muscle. If you feel tingling or numbness in your lower leg during a set, the band is too tight or positioned too low. Loosen it or move it up your thigh before continuing.
Pro Tip: Fabric bands that feel “medium” from one brand may feel “heavy” from another. Test any new band with 10 slow bodyweight squats before loading the movement. Your glutes should feel tension, not your knee ligaments.
The best banded glute exercises with step-by-step cues
These are the moves worth mastering. Hip thrusts and bridges lead for gluteus maximus recruitment, while lateral and rotational patterns bias the medius. Work through the full list to cover all three glute heads.
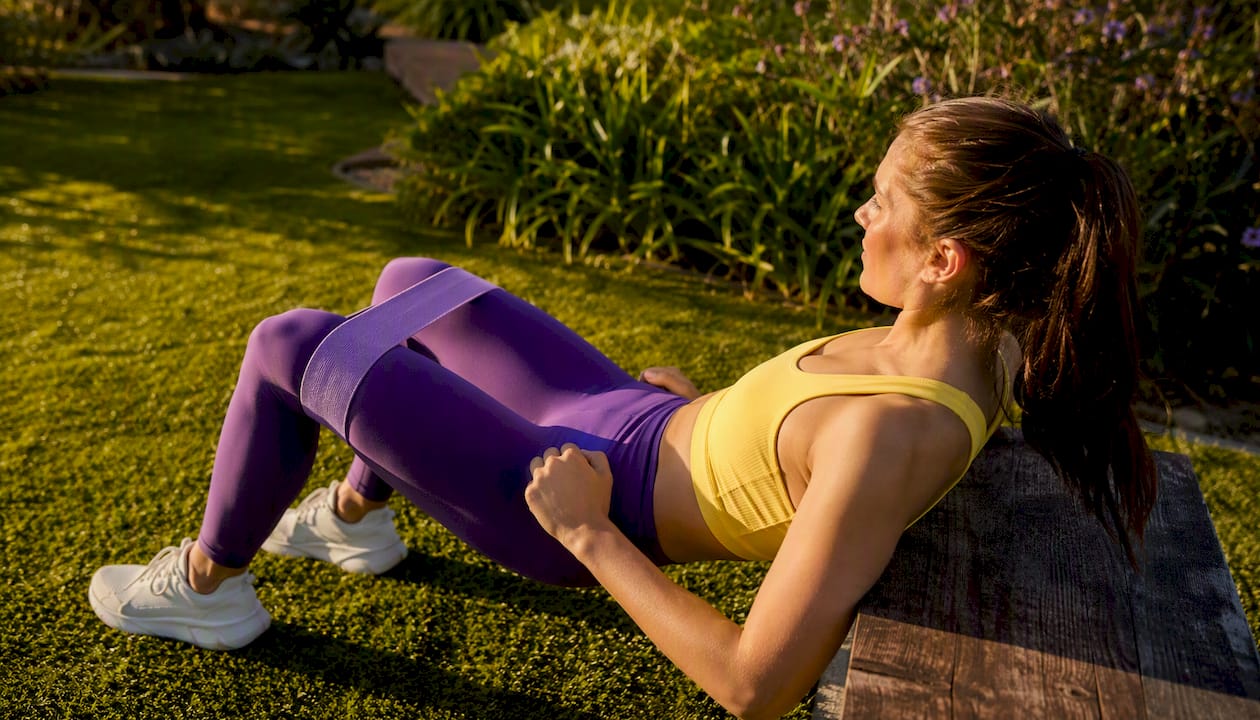
1. Banded glute bridge
Lie on your back, knees bent, feet flat, band above knees. Drive hips straight up until your body forms a straight line from knees to shoulders. Squeeze hard at the top for one full second, then lower with control.
- Cues: push knees out against the band throughout; keep ribs down; drive through your heels
- Common mistake: hyperextending the lower back at the top. Fix: tuck your pelvis slightly and think “ribs to hips”
- Variation: single-leg bridge (regression: feet elevated on a bench; progression: add a pause at the top)
- Targets: gluteus maximus, medius
2. Banded hip thrust
Sit with your upper back against a bench, band across your hips (or above knees for medius bias), feet hip-width. Drive hips up explosively, pause at the top, lower slowly.
- Cues: chin tucked, core braced, knees tracking over toes
- Common mistake: letting hips drop to one side. Fix: focus on equal pressure through both feet
- Variation: single-leg hip thrust (regression: bodyweight only; progression: add a dumbbell or plate across hips)
- Targets: gluteus maximus primarily
3. Lateral band walk
Band above knees, slight squat position, feet hip-width. Step sideways 12 steps right, then 12 steps left. Keep tension in the band the entire time; never let feet come fully together.
- Cues: stay low throughout; toes forward; control each step
- Common mistake: standing upright between steps. Fix: maintain the quarter-squat throughout
- Variation: forward/backward diagonal walk (regression: stand taller; progression: add ankle band simultaneously)
- Targets: gluteus medius, minimus
4. Clamshell
Lie on your side, hips stacked, knees bent at 45 degrees, band above knees. Keeping feet together, rotate your top knee toward the ceiling as far as your hip allows without rolling your pelvis back.
- Cues: imagine your hip is a hinge, not a wheel; keep your core engaged; don’t let your pelvis rock
- Common mistake: rotating the whole pelvis to get more range. Fix: place your top hand on your hip and feel for movement
- Variation: standing clamshell (regression: no band; progression: add a resistance loop at the ankle)
- Targets: gluteus medius, minimus
5. Monster walk
Band above knees, slight squat, feet shoulder-width. Walk forward 10 steps then backward 10 steps in an X-pattern, maintaining tension throughout.
- Cues: keep toes forward; don’t let knees cave inward; stay in the squat
- Common mistake: letting the band go slack between steps. Fix: keep feet wider than hip-width at all times
- Variation: lateral monster walk (regression: smaller steps; progression: heavier band)
- Targets: gluteus medius, hip abductors
6. Banded Romanian deadlift (RDL)
Stand on the band, hold the top loop in both hands at hip height. Hinge at the hips, pushing them back while lowering the band toward mid-shin. Drive hips forward to return.
- Cues: soft knee bend; flat back; feel the stretch in your hamstrings before driving up
- Common mistake: rounding the lower back. Fix: think “chest proud” as you hinge
- Variation: single-leg RDL (regression: reduce range of motion; progression: heavier band or add a dumbbell)
- Targets: gluteus maximus, hamstrings
7. Standing kickback
Band at ankles, hands on a wall or chair for balance. Keeping the working leg straight, drive it back and up until you feel a strong glute contraction. Lower with control.
- Cues: squeeze at the top; don’t rotate your hip outward; keep your standing leg slightly bent
- Common mistake: swinging the leg for momentum. Fix: slow the tempo to 2 seconds up, 2 seconds down
- Variation: cable-style kickback on all fours (regression: reduce range; progression: heavier ankle band)
- Targets: gluteus maximus
8. Fire hydrant
On all fours, band above knees. Keeping the knee bent at 90 degrees, lift one knee out to the side as high as your hip allows without rotating your torso.
- Cues: keep your hips square; brace your core; don’t let the opposite hip drop
- Common mistake: letting the lower back arch as the leg rises. Fix: exhale as you lift
- Variation: straight-leg fire hydrant (regression: no band; progression: add ankle weight)
- Targets: gluteus medius, minimus
9. Banded squat
Band above knees, feet shoulder-width, toes slightly out. Squat to parallel, pushing knees out against the band throughout. Drive through heels to stand.
- Cues: chest up; knees track over second toe; full hip crease below knee
- Common mistake: knees caving inward on the way up. Fix: actively press knees out against the band
- Variation: sumo squat (regression: box squat; progression: goblet squat with a dumbbell)
- Targets: gluteus maximus, medius, quads
10. Glute bridge pulse
Set up like a standard bridge. Drive hips up and hold at the top, then pulse 1–2 inches up and down for 20–30 reps. This is a metabolic finisher, not a strength move.
- Cues: stay at the top range; keep the squeeze; breathe steadily
- Common mistake: dropping too low between pulses. Fix: stay in the top third of the range
- Variation: single-leg pulse (regression: reduce pulse count; progression: add a pause every 5 pulses)
- Targets: gluteus maximus (metabolic stress)
Pro Tip: For any bridge or thrust variation, place a folded towel under your lower back if the floor feels uncomfortable. It won’t reduce the range of motion, but it will keep you from cutting reps short due to discomfort.
Three complete band-only workouts: beginner to advanced
Bands work for activation, strength, and short band-only routines at every level. Pick the template that matches where you are right now, not where you want to be.
| Template | Total Time | Exercises | Primary Band Placement |
|---|---|---|---|
| Beginner | 20–25 min | Glute bridge, lateral walk, clamshell, kickback | Above knees |
| Intermediate | 30–35 min | Hip thrust, monster walk, RDL, fire hydrant, squat | Above knees + ankles |
| Advanced | 40–45 min | Banded hip thrust (heavy), single-leg bridge, RDL, monster walk, pulse finisher | Above knees + hips (power band) |
Warm-up (all levels, 5 minutes)
- 10 bodyweight squats (slow, controlled)
- 10 hip circles each direction
- 10 glute bridges with no band (focus on the squeeze)
Beginner template
Rest about 45 seconds between sets. Use a light-to-medium fabric band above the knees.
- Glute bridge: multiple sets with moderate repetitions
- Lateral band walk: multiple sets with steps each direction
- Clamshell: multiple sets with repetitions per side
- Standing kickback: multiple sets with repetitions per side
Intermediate template
Perform exercises 1 and 2 consecutively without rest, then rest about 45 seconds. Use a medium-to-heavy fabric band.
- Banded hip thrust and monster walk (superset): multiple rounds with repetitions and steps
- Banded Romanian deadlift: multiple sets with moderate repetitions
- Fire hydrant: multiple sets with repetitions per side
- Banded squat: multiple sets with moderate repetitions
- Glute bridge pulse (finisher): multiple sets with repetitions
Advanced template
Use a heavy fabric band above the knees and a power band across the hips for thrusts. Rest about 30 seconds between sets; treat the finisher as a burnout.
- Banded hip thrust (power band): multiple sets with moderate repetitions
- Single-leg glute bridge: multiple sets with repetitions per side
- Banded Romanian deadlift: multiple sets with moderate repetitions
- Monster walk: multiple sets with steps each direction
- Glute bridge pulse (finisher): multiple sets with repetitions
Cooldown (all levels, 5 minutes)
- Figure-four stretch: 30 seconds per side (releases piriformis and glute medius)
- Lying hip flexor stretch: 30 seconds per side
- Child’s pose with knees wide: 60 seconds
How do you progress a band glute workout over time?
The progression roadmap runs in three phases: activation first, then strength, then overload. Most people skip phase one and wonder why their glutes don’t grow.
Phase 1 (weeks 1–3): Activation. Use light bands, focus on the mind-muscle connection, and nail form on bridges and clamshells before adding complexity.
Phase 2 (weeks 4–8): Strength. Move to heavier bands, add sets, and introduce hip thrusts and RDLs. Target 8–12 reps per set with a 2-1-2 tempo.
Phase 3 (weeks 9+): Overload. Increase band resistance, shift band placement to ankles for kickbacks and fire hydrants, add external load (dumbbell on hips for thrusts), or introduce power-band variations.
Practical progression steps:
- Increase band resistance when you can complete all sets with 2 clean reps in reserve
- Move the band lower (mid-thigh to above ankle) to increase leverage and difficulty
- Add one set per exercise per week until you reach 4 working sets
- Slow the eccentric (lowering) phase from 2 seconds to 3–4 seconds for more time under tension
- Add pulse finishers at the end of a session for metabolic stress
Weekly frequency: 2–3 band glute sessions per week works well for most people. Pair one session with a full lower-body lift and run one as a standalone band-only day. Glutes recover faster than quads, so 48 hours between sessions is usually enough.
The 8-8-8 method is a hypertrophy technique worth knowing: perform 8 reps with a 2-second hold at the top, 8 reps at normal tempo, then 8 pulse reps at the top of the range, all without resting. It creates significant metabolic stress and is best used as a finisher on bridges or hip thrusts, not as your primary strength work. For a broader workout routine built from scratch, this method slots in as the last exercise of a session.
What are the red flags and common mistakes to fix?
Stop or modify immediately if you experience any of these three: sharp joint pain in the hip or knee, tingling or numbness below the band, or persistent lower-back arching you cannot correct mid-set. These are not “push through it” signals.
Common technical errors and fixes:
- Knee cave on bridges/squats: actively press knees out against the band; don’t let the band win
- Lower back taking over in hip thrusts: tuck your pelvis at the top; if your back arches, reduce the band resistance
- Hips hiking on single-leg work: slow down and film yourself from the side; asymmetry usually means the working glute is underloaded
- Band rolling down mid-set: switch to a fabric band; if you’re using latex, apply it over leggings rather than bare skin
- Cutting range of motion short: use a mirror or phone camera to check depth on bridges; hips should reach full extension at the top
For hip pain or limited mobility: replace hip thrusts with glute bridges (smaller range of motion), and use a mid-thigh band placement instead of above the knee. If pain persists beyond a session, consult a physical therapist before continuing.
Pro Tip: To stop a fabric band from rolling, choose a band with a textured inner grip. If yours is smooth, apply it slightly higher than you think you need to. Gravity and movement will pull it down to the right spot within the first few reps.
What does the evidence say about hip thrusts and band training?
EMG and clinical literature show that hip thrusts and bridges produce high gluteus maximus recruitment, and that elastic resistance can deliver meaningful strength adaptations. That’s the one-sentence version. Here’s what the research actually supports.
Key findings:
- EMG studies confirm high gluteus maximus activation during hip-extension movements, particularly at peak contraction in hip thrusts and bridges, supporting their central place in any glute development program
- Systematic reviews on elastic resistance find that bands can substitute for free weights in producing strength improvements in some populations, which means a band-only program is not a compromise for beginners or intermediate trainees
- Hip thrusts rank as the most cited exercise for maximizing gluteus maximus recruitment at peak contraction; the glute bridge is a close second for isolation and activation work
Trainer notes:
- Tempo and squeeze: a deliberate 1-second isometric hold at the top of every bridge or thrust increases time under tension without adding load. Small change, measurable difference in how the muscle feels the next day.
- Medius bias: lateral band work (walks, clamshells, fire hydrants) specifically targets the gluteus medius, which controls knee alignment during running and squatting. Training the medius reduces knee valgus, a common injury pattern in athletes. For readers building toward explosive leg power, medius strength is a prerequisite, not an afterthought.
What should you realistically expect from band glute training?
Consistent band work over several weeks, with two to three sessions per week, can produce noticeable improvements in glute activation, hip stability, and muscular endurance. Strength gains typically appear before visible shape changes, which depend on overall training volume and nutrition.
Here’s what the research and coaching experience support: bands are highly effective for activation and moderate strength gains. They are less effective than heavy barbell work for maximal hypertrophy, simply because peak load is lower. The practical answer is to use bands as a primary tool when you’re at home or traveling, and as a complement to barbell work when you have access to a gym.
Shape versus size is a distinction worth making. Bands will firm and define the glutes noticeably within 6–8 weeks. Adding significant mass requires progressive overload beyond what most bands can provide long-term. That’s not a knock on bands; it’s just physics. Use the beginner resistance band guide to build your foundation, then layer in heavier tools as you progress.
The one behavioral tip that matters most: do the warm-up. Every session. Skipping the 5-minute activation sequence is the single most common reason people feel their quads more than their glutes during bridges.
Build your starter kit with Dietexerciseshop
The fastest way to get started is a three-band kit: one light fabric booty band for activation, one medium fabric band for strength work, and one heavy band for loaded hip thrusts and RDLs. That covers every template in this guide without overcomplicating your setup.
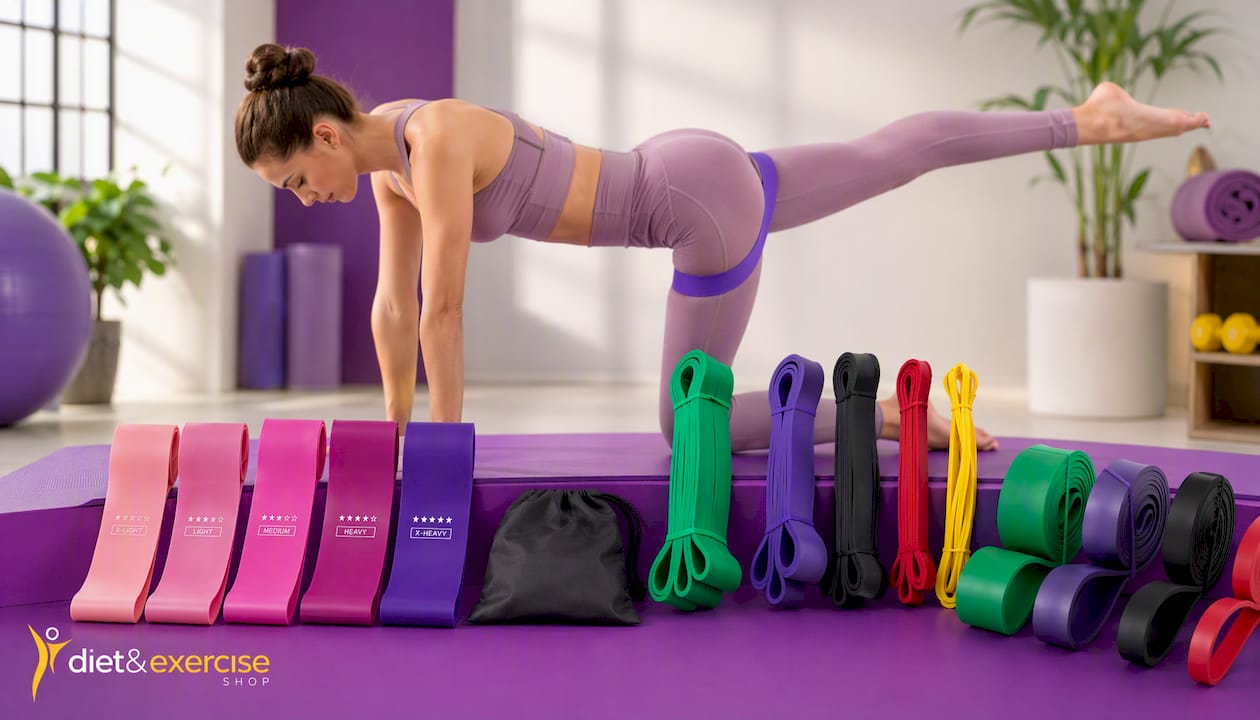
Dietexerciseshop carries resistance bands for training and strength resistance bands suited to the beginner through advanced templates above. If you want structured programming to go alongside your band work, the eBooks collection includes downloadable guides built around the same principles covered here. And if you train in gear that actually says something, the MEAL PREP & MUSCLE REPS Hoodie and the TRUST THE PROCESS T-Shirt are worth a look. These are publisher products. Start with the bands, add the programming, and wear the mindset.
Sources
- Pubmed
- PMC article (elastic resistance literature review)
- Resistance Band Exercises For Glutes – BarBend
- Health
- Best Resistance Band Exercises for Glutes & Booty | POWERBANDS®
FAQ
Do glute bands actually work?
Yes. Elastic resistance produces strength gains comparable to free weights in some populations, and adding a band to bridges and hip thrusts increases gluteus medius activation beyond what bodyweight alone achieves.
Can you build glutes with just resistance bands?
You can build meaningful activation, endurance, and moderate strength with bands alone, particularly in the first 8–12 weeks. For significant mass gain beyond that point, adding heavier external load (dumbbells, barbells) alongside bands tends to produce better results.
What is the 8-8-8 rule for glutes?
The 8-8-8 method involves performing 8 reps with a 2-second hold at the top, 8 reps at normal tempo, and 8 pulse reps at the top of the range, all in one unbroken set. It’s a hypertrophy finisher best used on bridges or hip thrusts at the end of a session.
What is the number one best glute exercise?
The hip thrust consistently ranks first for gluteus maximus recruitment at peak contraction, based on EMG research and practical programming evidence. The glute bridge is a close second and the better starting point for beginners.
Where should you place a glute band for best results?
Above the knees is the standard placement for bridges, squats, and lateral walks, targeting both the gluteus maximus and medius. Move the band to the ankles for kickbacks and fire hydrants to increase difficulty and isolate the hip extensors more directly.