

Yes, You Can Get a Real Workout in a Hotel Room
Resistance bands are enough to maintain strength and preserve mobility on any trip, and you can start proving it in the next ten minutes. Skip the gym-hunting and the bodyweight-only compromise. Here’s a starter circuit you can run tonight, plus the minimal kit that makes it possible.
Tonight’s circuit (repeat 3 rounds):
- Banded squat, 15 reps, band under both feet
- Standing band row, 12 reps per side, anchored to a door
- Glute bridge with band above the knees, 15 reps
Beginners: drop to 2 rounds and use a lighter band. Advanced travelers: add a fourth round and slow the eccentric to 3 seconds on every rep.
Your minimal pack list: a set of loop bands in varying tensions plus a micro band for activation work, and a flat door anchor. That’s a lightweight set of gear and it covers almost every muscle group you’ll need on the road.
Key Takeaways
A travel resistance band workout preserves strength and mobility on the road when you pair a two to three band kit with a consistent 20 to 25 minute circuit three times a week.
| Point | Details |
|---|---|
| Pack a minimal kit | One heavy loop, one medium loop, a micro band, and a door anchor cover nearly every exercise. |
| Prioritize mobility on arrival | Address hip flexors and thoracic rounding before loading heavy on travel day. |
| Slow the eccentric | A 2 to 4 second lowering phase increases difficulty without needing a heavier band. |
| Test every anchor first | Three or four hard pulls before loading confirms a door or fixture is safe to use. |
| Build your kit with Dietexerciseshop | Pair the resistance band and pull-up assist set with the FUNCTIONAL FITNESS eBook for a full travel program. |
Table of Contents
- Why Resistance Bands Work So Well for a Travel Resistance Band Workout
- What Travel Does to Your Hips, Spine, and Shoulders
- Essential Resistance Band Exercises With Form Cues
- Three Ready-to-Run Travel Workouts
- Building Your Travel Fitness Kit
- How to Anchor Bands Safely in Any Hotel Room
- Sets, Reps, and Tempo for Maintaining or Building Strength
- Keeping Your Bands Clean and Ready to Use
- Common Mistakes That Cause Travel Band Injuries
- A Personal Note on Making It Happen
- Your Travel Kit, Sorted in One Stop
- Sources
- FAQ
Why Resistance Bands Work So Well for a Travel Resistance Band Workout
Bands solve the two biggest problems travelers face with fitness gear: bulk and joint stress. A loop band folds into a pocket. A 45 pound dumbbell does not fit in a carry-on, full stop.
The resistance also builds as you stretch the band, which means the load ramps up exactly where your muscles are strongest through a range of motion, and eases off near the joint’s vulnerable end ranges. That accommodating curve is part of why bands feel different from a fixed weight and why they’re forgiving on stiff, travel-worn joints.
The evidence: A body of research comparing elastic resistance training to conventional weight training found comparable strength gains across upper and lower limbs. You are not settling for a lesser workout when you swap dumbbells for bands. You’re using a different tool that produces similar results.
What else makes bands travel-ready:
- No weight limit surprises at check-in, no rack space needed, no noise complaints from the room next door.
- One band set replaces a squat rack, cable machine, and dumbbell tree for the exercises that matter most.
- Bands pack flat, so they slide into a laptop sleeve or the side pocket of a duffel without adding meaningful weight.
What Travel Does to Your Hips, Spine, and Shoulders
Six hours in an economy seat does specific, predictable damage. Your hip flexors shorten from sitting in a flexed position, your thoracic spine rounds forward, and your shoulders roll in from hunching over a phone or a tray table. None of that is dramatic on its own, but stack a few flights or a long drive together and you’ll feel it the moment you try to squat.
Run this sequence before you touch a band on arrival day:
- Kneeling hip flexor stretch, 30 seconds per side, driving the hips forward gently.
- Open-book thoracic rotations lying on your side, 8 reps per side.
- Banded shoulder pull-aparts, 15 slow reps, focusing on squeezing the shoulder blades together.
Pro Tip: On arrival day, choose mobility over loading. Your nervous system is jet-lagged and your tissues are stiff from sitting. A 10-minute mobility session beats a heavy pump session for how you’ll feel and perform the next day.
Essential Resistance Band Exercises With Form Cues
A handful of exercises cover nearly everything you need for a full-body travel resistance band workout. Here’s how to do each one correctly in a space the size of a hotel room.
Lower body:
- Banded squat: Stand on the band with feet shoulder-width apart, handles at shoulder height. Sit back like you’re reaching for a low chair, keep your chest up, and drive through your heels.
- Split squat: One foot forward on the band, one foot back. Lower straight down, not forward, to protect the front knee.
- Romanian deadlift: Stand on the band, hinge at the hips with a soft knee bend, and let the band load your hamstrings on the way down. Keep your spine neutral, not rounded.
- Glute bridge: Band above the knees, feet flat, drive your hips up and squeeze your glutes at the top for one full second.
- Lateral band walk: Band around the ankles or above the knees, knees slightly bent, step sideways while keeping tension on the band the entire time.
Push:
- Standing chest press: Anchor the band behind you at chest height and press forward, keeping your elbows slightly bent.
- Overhead press: Stand on the band, press the handles overhead without arching your lower back.
Pull:
- Bent-over row: Stand on the band, hinge forward slightly, and row the handles to your ribs.
- Door-anchored lat pull: Anchor high on a door, kneel or stand back for tension, and pull down and back like a lat pulldown.
- Band pull-apart: Hold the band at arm’s length in front of you and pull it apart, squeezing your shoulder blades.
Arms and core:
- Biceps curl: Stand on the band, elbows pinned to your sides, curl slowly.
- Triceps pressdown: Anchor high, elbows tucked, press down and control the return.
- Pallof press: Anchor at chest height to your side, press the band straight out and resist rotation.
- Banded plank walk-outs: Loop a band around your wrists in plank position and slowly step your hands out and back without letting your hips sag.
The single biggest mistake with all of these is rushing the eccentric, the lowering phase. Slow it down to two to four seconds and every one of these moves gets noticeably harder without adding a heavier band.
Three Ready-to-Run Travel Workouts
Time is the real constraint on the road, not motivation. Choose the workout that fits your window.
1. The 10 to 15 minute morning activator Two minutes of hip and thoracic mobility, then three compound moves for two rounds: banded squat, band pull-apart, glute bridge. No rest between exercises, 60 seconds between rounds.
2. The 20 to 25 minute full-body maintenance circuit This is your bread-and-butter travel session. Run a moderate number of rounds and repetitions per exercise with 30 to 60 seconds of rest between rounds: squat, row, overhead press, Romanian deadlift, Pallof press, lateral band walk. A six-move long-loop band routine built around similar principles works well as a template if you want a proven structure to follow.
3. The 30-minute build session Switch to your heaviest band, slow every eccentric to three or four seconds, and drop to 8 to 10 reps per set across four rounds. Rest 60 to 90 seconds between rounds since the intensity is higher.
How you scale any of these three comes down to four levers:
- Band tension (light, medium, heavy)
- Distance from the anchor point (farther away increases tension at the start of the movement)
- Tempo (slower eccentrics increase difficulty without a heavier band)
- Total rounds (add a round instead of adding weight when you plateau)
No door anchor available? Swap the anchored pulls for standing rows and Pallof presses, both of which only need you standing on the band.
Building Your Travel Fitness Kit
A two-band system, medium plus heavy, along with a micro band handles nearly every scenario a trip throws at you, from warm-up activation to a genuinely hard leg session. Add a flat door anchor and you’ve got a complete mini gym for travel that weighs less than a pair of sneakers.
- Loop bands are the most versatile: no handles to lose, they double as ankle loops, and they pack into a space smaller than a fist.
- Tube bands with handles feel more like a cable machine and are better for pressing and pulling movements, but they add bulk and the handles can crack over time.
- Fabric bands grip better against skin and don’t roll during lateral walks, though they’re bulkier than latex and slower to dry if they get sweaty.
For packing logistics, bands sail through airport security in a carry-on since they contain no metal parts or liquids. Roll them, don’t fold them, to reduce long-term creasing, and keep the door anchor in an outer pocket so it’s not buried under clothes when you want a quick session. Our buyer’s guide to travel-friendly bands breaks down specific tension ratings if you want to match bands to your current strength level before you buy.
How to Anchor Bands Safely in Any Hotel Room
A band is only as safe as its anchor point. Before you load up a heavy pull, run this checklist:
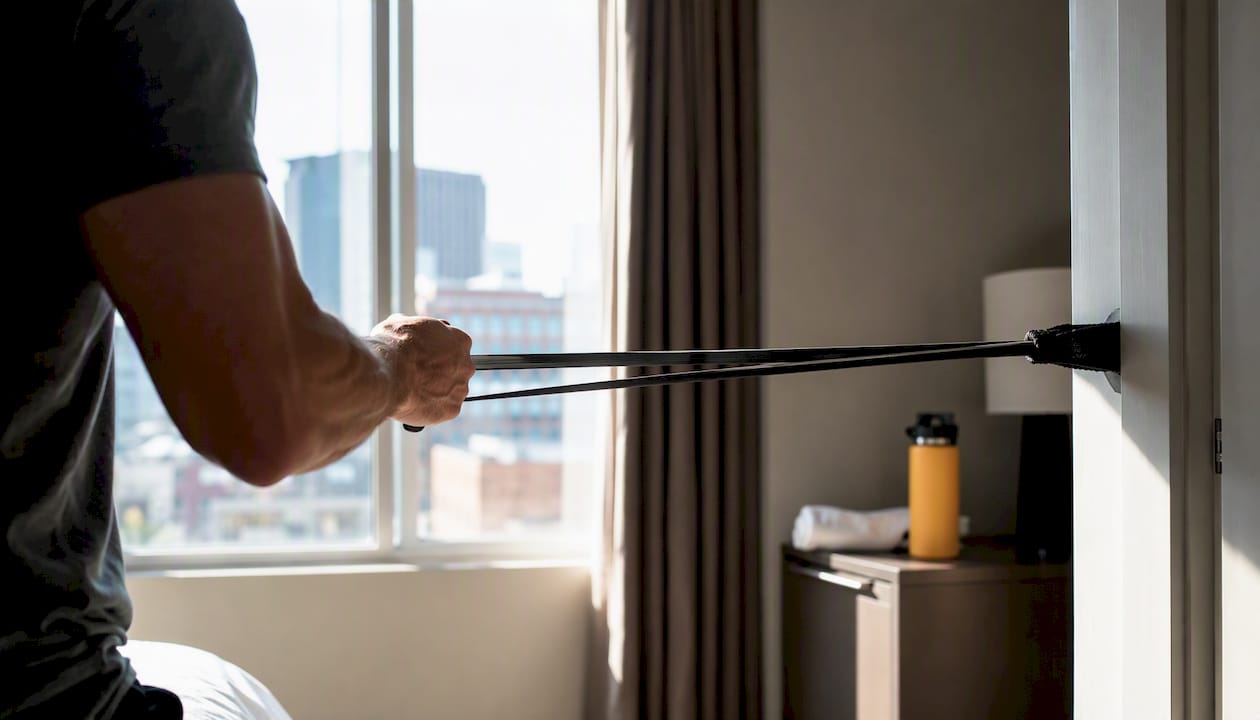
- Wedge the door anchor at the hinge side of a closed door and give it three or four hard test pulls at the tension you plan to use.
- Check the door swings the opposite direction from your pull, so your bodyweight can’t force it open mid-rep.
- Inspect the band itself for nicks, cracks, or thinning before every trip. Small cracks are how bands snap mid-set.
- For chairs, bed frames, or a sturdy railing outdoors, choose objects with weight or a fixed base, and never anchor to anything with wheels or hinges that can shift under load.
Anchor height changes the exercise: high for pulldowns and face pulls, mid-height for rows and presses, low for curls and leg work. Learning that one rule turns a single band into a dozen different exercises.
Pro Tip: If an anchor point feels the slightest bit unstable, don’t risk a heavy pull. Switch to standing exercises that use only your bodyweight against the band instead.
Sets, Reps, and Tempo for Maintaining or Building Strength
Maintenance mode needs less than most people assume. A few sessions per week, two to three rounds of compound-focused circuits, is enough to hold onto the strength you built at home during a week or two on the road.
To actually build while traveling, increase your frequency to four sessions, add a round to each circuit, or slow your eccentrics further. Deliberately slow eccentric phases, roughly two to four seconds, compensate for the fact that bands can’t match a barbell’s peak load, and they’re your best lever for increasing difficulty without new equipment.
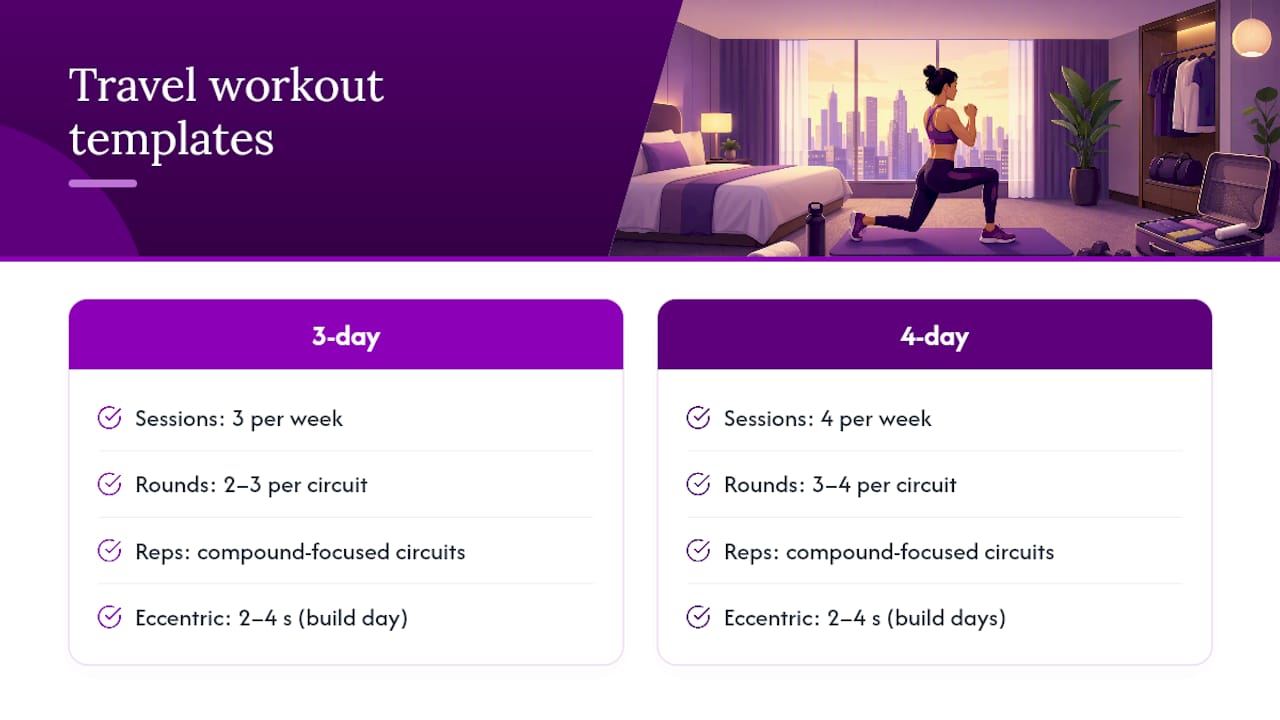
A simple 3-day template: full-body maintenance circuit on day one, mobility plus an activator on day two, a build session on day three. A 4-day template adds a second build session, split lower body and upper body.
Keeping Your Bands Clean and Ready to Use
Bands pick up sweat, dust, and hotel carpet grime fast, and neglecting that shortens their lifespan considerably. Wipe latex or fabric bands down with a damp cloth after every session, especially before repacking them while still warm and slightly damp from use.
For a deeper clean, hand wash bands in lukewarm water with a small amount of mild soap, then air dry them completely before rolling them up. Never toss a band in a hot dryer or leave it in direct sunlight on a car dashboard. Heat degrades latex quickly and turns a durable band brittle within weeks instead of months.
Fabric bands need slightly different care. They absorb more sweat than latex, so let them dry fully before packing or you’ll open your bag to a musty smell a few days into the trip. A quick air-out on a chair or towel rack overnight solves this.
Check your bands for wear every few uses, not just before a trip. Look for pinholes, thinning patches, or a slightly tacky texture that signals the material is starting to break down. If a band does snap mid-session, that’s not the end of your workout. You can switch to higher-rep accessory work and mobility with your remaining bands and finish strong.
Rotate two sets of bands if you travel often, giving each set recovery time between uses the same way you’d rotate running shoes. This single habit adds months to their usable life and saves you from an unwelcome surprise mid-set in an unfamiliar hotel room.
Common Mistakes That Cause Travel Band Injuries
Most band injuries come from a handful of repeatable errors, not bad luck. Fix these and you eliminate most of the risk.
Skipping the pull test. Anchoring to an unfamiliar door or fixture without testing it first is the single most common cause of falls and pulled muscles on the road. Always test at your working tension before you commit to a heavy rep.
Using a worn band at full tension. A band that’s been through a dozen trips loses elasticity and develops microscopic cracks you won’t see without a close look. Stretch it fully in good light before each trip and retire anything that looks thin or feels tacky.
Skipping the warm-up because time is tight. Cold, travel-stiff hips and shoulders under sudden band tension are a recipe for a strain. Even 90 seconds of dynamic movement first cuts that risk substantially.
Snapping into the top of a rep. Bands generate the most force near full stretch, and jerking into that end range, especially on presses and pull-aparts, stresses tendons more than a controlled rep. Slow down as you approach full extension.
Ignoring foot or hand position. A band that slips out from under your foot mid-squat, or rolls off a door anchor mid-pull, is how ankles turn and shoulders wrench. Recheck your setup every few reps, not just at the start.
Doing only pulling or only pushing. Bands make pulling exercises easy to default to since they’re simple to anchor. Neglecting pushing work creates a shoulder imbalance over a multi-week trip.
A Personal Note on Making It Happen
Pack the bands before you pack your shoes. Schedule the session like a meeting, not an afterthought. One recent hotel-room session took twelve minutes between a shower and a client call, and it was enough. Consistency on the road beats intensity at home.
— Mark
Your Travel Kit, Sorted in One Stop
You don’t need to piece together your travel fitness kit from three different vendors. Dietexerciseshop carries the bands, the anchors, and the programming guides in one place, built specifically for the routines covered above.

Our resistance band and pull-up assist set covers the exact loop and tube variety you need for every exercise in this guide, from banded squats to door-anchored rows, and it packs down small enough to disappear into a carry-on. Pair it with the FUNCTIONAL FITNESS eBook for a full progressive program that extends well past your trip, structured around the same maintenance and build principles laid out here.
If you’d rather stay motivated with a visual reminder of why you started, browse the t-shirt collection, including the SQUATS? I THOUGHT YOU SAID SQUASH? T-Shirt and the TURNIP THE GAINS T-Shirt, both built for the gym or the airport terminal. Cooler climates call for the MEAL PREP & MUSCLE REPS Hoodie, the CARDIO AND CARBS, THE PERFECT PAIRING Hoodie, or the RUNNING ON COFFEE AND PROTEIN SHAKES Hoodie for early flights and cold hotel gyms. Want extra core work between band sessions? The Abs Stimulator packs flat and needs no anchor at all.
Check out the full travel band buyer’s guide to pick the exact tension for your current strength level, then order your kit before your next trip.
Sources
- Why you should pack resistance bands when you travel — The Manual
- No gym, no worries—use this six-move resistance band routine to build full-body strength and mobility — Fit&Well
- You can train anywhere: Bob Merkh’s complete band workout guide — EliteFTS
FAQ
Is a resistance band a good workout while on vacation?
Yes. Elastic resistance training produces strength gains comparable to conventional weight training, and a band kit weighs under a pound, making it practical for any hotel room or vacation rental.
What are some good resistance band workouts for travel?
A 20 to 25 minute full-body circuit covering squats, rows, presses, Romanian deadlifts, and lateral walks for 2 to 4 rounds of 12 to 15 reps hits every major muscle group with only a door anchor needed.
Does TSA allow resistance bands?
Yes. Resistance bands contain no metal parts or liquids, so they pass through airport security screening in carry-on luggage without issue.
What is the 3-3-3 rule for workouts?
Definitions vary across fitness communities, but one common version refers to three exercises, three sets, and three-minute rest windows for a simple, minimal-equipment session, a structure that adapts well to a compact travel band routine.