

Senior Dumbbell Workout That Maps Each Move to Daily Tasks
A safe senior dumbbell workout is a short full-body routine done several times per week, built around squat, hinge, push, and pull movements. Do multiple sets of controlled reps, keep some reps in reserve, and add weight gradually in small steps. Check with your doctor first if you have joint issues, heart conditions, or haven’t trained in years.
TL;DR:
- Starting with 2 to 3 pound dumbbells for upper body exercises and gradually increasing weight ensures safety and effective progression.
- Performing controlled sets of 8 to 12 reps, with at least 24 hours of recovery between sessions, aligns with CDC guidelines for older adults.
- Incorporating key movements like squats, hinges, pushes, and pulls enhances functional strength for daily activities such as lifting and standing.
- Modifications like seated exercises or shortened ranges help accommodate balance, joint, or mobility limitations safely.
- Using small weight increments and logging progress can prevent overexertion, reduce injury risk, and promote long-term strength building.
Table of Contents
- What Does a Senior Dumbbell Workout Actually Involve?
- Three Sample Dumbbell Routines You Can Start This Week
- How Much Weight Should You Start With?
- Staying Safe: Modifications and Warning Signs
- Setting Up a Safe Home Workout Space
- Mark’s 8-Week Progression for Building Real Strength
- Why I Built This Plan Around Daily Tasks, Not Gym Numbers
- Practical Resources to Support Your Progression
- Where This Guidance Comes From
- Sources
- FAQ
What Does a Senior Dumbbell Workout Actually Involve?
You don’t need a gym membership or a rack of forty dumbbells to get stronger after 60. You need a handful of movements that mirror what your body already does every day: standing up from a chair, picking a grocery bag off the floor, reaching a shelf, opening a heavy door. That’s the entire logic behind functional dumbbell training, and it’s why the American College of Sports Medicine’s resistance training guidelines build programs around core movement patterns including squat, hinge, push, and pull.
Here are the exercises worth learning first, with the daily task each one supports.
-
Goblet squat (sit to stand pattern). Hold one dumbbell against your chest with both hands, feet shoulder width apart. Sit your hips back like you’re lowering into a chair, then drive up through your heels. This is the exact movement pattern behind getting off the couch or off the toilet without using your arms. Modification: place an actual chair behind you and tap it lightly with each rep. Start with a few sets of controlled repetitions. Common error: knees caving inward. Fix it by pushing your knees out toward your shoes on the way down.
-
Dumbbell deadlift (hip hinge). Hold a dumbbell in each hand, soft knees, and push your hips back while your torso tips forward, keeping your spine long. This trains the exact mechanics of a safe floor pickup. Modification: stop the range at knee height instead of reaching the floor if your hamstrings or lower back are tight. 2 to 3 sets of 8 to 12 reps. Common error: rounding the lower back. Fix it by keeping your chest lifted and eyes forward, not down.
-
Seated or standing overhead press. Press dumbbells from shoulder height straight overhead. This builds the strength to lift a suitcase into an overhead bin or a box onto a high shelf. Modification: seated in a chair with back support removes balance demands entirely. 2 to 3 sets of 8 to 12 reps. Common error: arching the lower back to finish the press. Fix it by pressing slightly forward, not straight up over the spine.
-
Bent over or supported row. With one hand and knee braced on a bench (or seated and hinged forward), pull a dumbbell to your ribs. Posture and pulling strength help counter forward hunch. Multiple sets of moderate repetitions per side are beneficial. Common error: yanking with the shoulder. Fix it by leading with the elbow, not the hand.
-
Dumbbell chest press. Lying on a bench or firm surface, press dumbbells up over your chest. This supports pushing open heavy doors or pushing yourself up from lying down. Modification: floor press with elbows resting on the ground shortens the range and protects the shoulder. 2 to 3 sets of 8 to 12 reps. Common error: flaring elbows to 90 degrees. Fix it by keeping elbows closer to a 45-degree angle.
-
Biceps curl and grip work. Curl dumbbells with control, and finish sets by simply holding a moderately heavy dumbbell for 20 to 30 seconds. Grip strength is one of the better predictors of overall function later in life. 2 to 3 sets of 8 to 12 reps.
-
Calf raises for ankle stability. Holding light dumbbells, rise onto your toes near a wall or countertop for balance. This trains ankle stability important for balance. Do several repetitions with good form.
Three Sample Dumbbell Routines You Can Start This Week
Pick the one that fits your calendar. All three use the same movement logic above, just arranged differently.
-
The 10-minute daily circuit. Grab one dumbbell. Do 30 seconds each of goblet squats, standing rows (one arm bracing on a counter), overhead presses, and calf raises. Rest 30 seconds between exercises. Repeat the whole circuit twice. This isn’t a replacement for strength days, it’s a way to keep joints moving on off days without adding fatigue.
-
The 2-day beginner full body plan. On two non consecutive days (say Monday and Thursday), perform: goblet squat, dumbbell deadlift, chest press, bent over row, and calf raises. Do multiple sets of controlled repetitions per exercise, resting between sets to allow recovery. If a dumbbell exercise bothers a joint, swap in a bodyweight version (chair sit to stand instead of goblet squat) until you rebuild confidence.
-
The 3 day progressive plan. Train Monday, Wednesday, Friday, using all seven exercises from the list above at 3 sets of 8 to 12 reps. Add a light mobility day on Tuesday or Saturday: gentle walking plus shoulder and hip stretches, nothing loaded. Every two to three weeks, if your top set feels easy with clean form, add the smallest available weight increment. The CDC’s guidance for older adults calls for 24 to 48 hours of recovery between sessions hitting the same muscle groups, which this schedule respects.
Warm up (5 minutes): marching in place, arm circles, bodyweight squats, and shoulder rolls. Cool down (5 minutes): slow walking to bring your heart rate down, then static stretches for hamstrings, chest, and calves, holding each for 20 to 30 seconds.
How Much Weight Should You Start With?
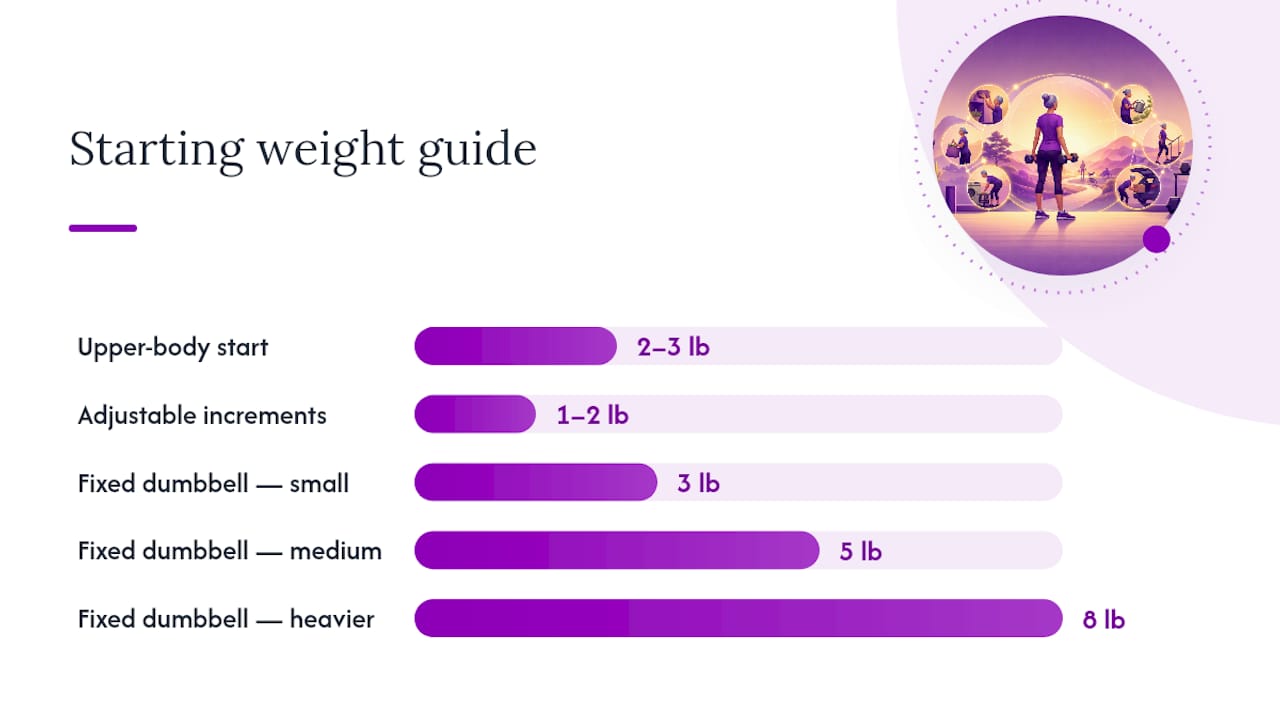
Choose a weight you can control for 8 to 12 reps while leaving 1 to 2 reps in reserve. If you can’t hit 8 clean reps, it’s too heavy. If you could easily do 15 or more, it’s too light for that exercise.
The CDC’s Growing Stronger workbook recommends most older beginners start with 2 to 3 pound dumbbells for upper body movements like presses and curls, then reassess after about one week, or three sessions. Lower body movements like squats and deadlifts typically tolerate more weight from the start since the legs are already used to carrying your body weight daily.
Starting weight snapshot for typical older beginners: The CDC recommends beginning with 2 to 3 pound dumbbells for upper body presses and curls, increasing gradually once a week’s worth of sessions feels manageable with full range of motion and no joint discomfort.
Once you’re consistent, follow this simple progression rule: increase the load by the smallest available increment once you can complete your top rep range for two sessions with clean form and control. Verywell Fit’s coaching guidance puts it plainly: if your form breaks down in the last two reps, the weight is too heavy, regardless of how easy the first six reps felt.
A few practical notes on equipment:
- Adjustable dumbbells (the kind with a dial or pin system) save space and let you make 1 to 2 pound jumps without buying a whole new set.
- Fixed dumbbells in pairs (say, 3, 5, and 8 pounds) are simpler to grab and less likely to slip or reset mid-workout.
- Either way, starting with the right weight from day one matters more than the brand or style you buy.
Staying Safe: Modifications and Warning Signs
Before your first session, run through a short mental checklist: has your doctor cleared you for resistance exercise, are you on any medication that affects balance or blood pressure, and do you know your resting blood pressure range. None of this needs to be complicated, but skipping it isn’t worth the risk.
Common modifications that keep you training instead of sidelined:
- Limited balance: do standing exercises seated in a sturdy chair, or hold a countertop with one hand.
- Knee or hip discomfort: shorten the squat range, stopping well above parallel, and build depth gradually over weeks.
- Limited floor mobility: avoid picking dumbbells up off the floor to standing; instead, rest them on a bench or table at waist height so you never need a risky floor to standing transition.
- Wrist or grip issues: switch to a neutral grip (dumbbells held vertically, like a hammer) for presses and curls.
Learn to tell the difference between muscle fatigue and joint pain. Mild soreness that shows up a day after training and fades within 48 to 72 hours is normal. Sharp, stabbing pain in a joint during or right after an exercise is not, and it’s a signal to stop that set immediately, rest, and check in with a physical therapist or doctor if it persists.
Pro Tip: Keep a simple notebook or phone note logging weight, sets, and reps for each session. When two sessions in a row feel easy at the top of your rep range, that’s your cue to add weight, not a guess.
Setting Up a Safe Home Workout Space
You don’t need much. A pair of dumbbells (or one adjustable set), a sturdy chair or bench, a non slip mat, and shoes with real tread cover almost everything above.
- A home dumbbell setup with small weight increments matters more than a large collection of heavy ones you’ll never lift safely.
- Clear a floor space roughly 6 by 6 feet, free of rugs that could slide.
- Keep a stable surface, like a side table, within reach to set dumbbells down between sets rather than holding them while you catch your breath.
- If you’re following a video routine, prop your phone or tablet at eye level so you’re not craning your neck to see the screen.
Some readers like adding a bit of personality to that space. A custom canvas print near your workout corner is a small touch that makes a home routine feel less like an obligation and more like a habit worth showing up for.
Mark’s 8-Week Progression for Building Real Strength
This is the plan I’d hand a friend just starting out, structured in two-week blocks so you’re not guessing what changes and when.
- Weeks 1 to 2: Learn the movements. 2 sets of 10 reps at your lightest weight, focusing entirely on form. Skip any exercise that causes joint discomfort and substitute a modification instead.
- Weeks 3 to 4: Add a third set. Same weight, same reps, just more total volume. This is where most people notice they’re not as sore the next day.
- Weeks 5 to 6: Increase weight by the smallest increment available, but only on exercises where your last two sessions felt easy with clean form.
- Week 7: Deload. Drop back to 2 sets and your week 1 weight. Your joints and connective tissue need this recovery window even if your muscles feel ready for more.
- Week 8: Reassess. Retest your rep max on each movement, log the results, and decide which exercises are ready for another weight increase heading into your next 8-week block.
If you want more structure at the back end of this plan, a dumbbell leg progression can extend the lower body work once squats and deadlifts feel solid. Pace is individual. Someone recovering from a hip replacement will move through these eight weeks differently than someone who played tennis last year, and that’s fine. When in doubt about a specific joint or condition, your physical therapist or doctor knows your case better than any article can.
Why I Built This Plan Around Daily Tasks, Not Gym Numbers
I didn’t design this around how much weight someone can lift. I designed it around whether someone can still carry their own groceries, get off the floor after gardening, and sleep without a sore back. That’s what a senior dumbbell workout should be judged on, not the number on the dumbbell. Many people in this stage of life want structure without a gym membership, and the eBooks and equipment linked below are commercial products built around the same functional logic as everything above.
— Mark
Practical Resources to Support Your Progression
If you like having a written plan instead of piecing one together yourself, the Kettlebell Transformation eBook lays out progressive routines and programming templates that translate well to dumbbell work for readers who’ve mastered the basics above and want a structured next step.
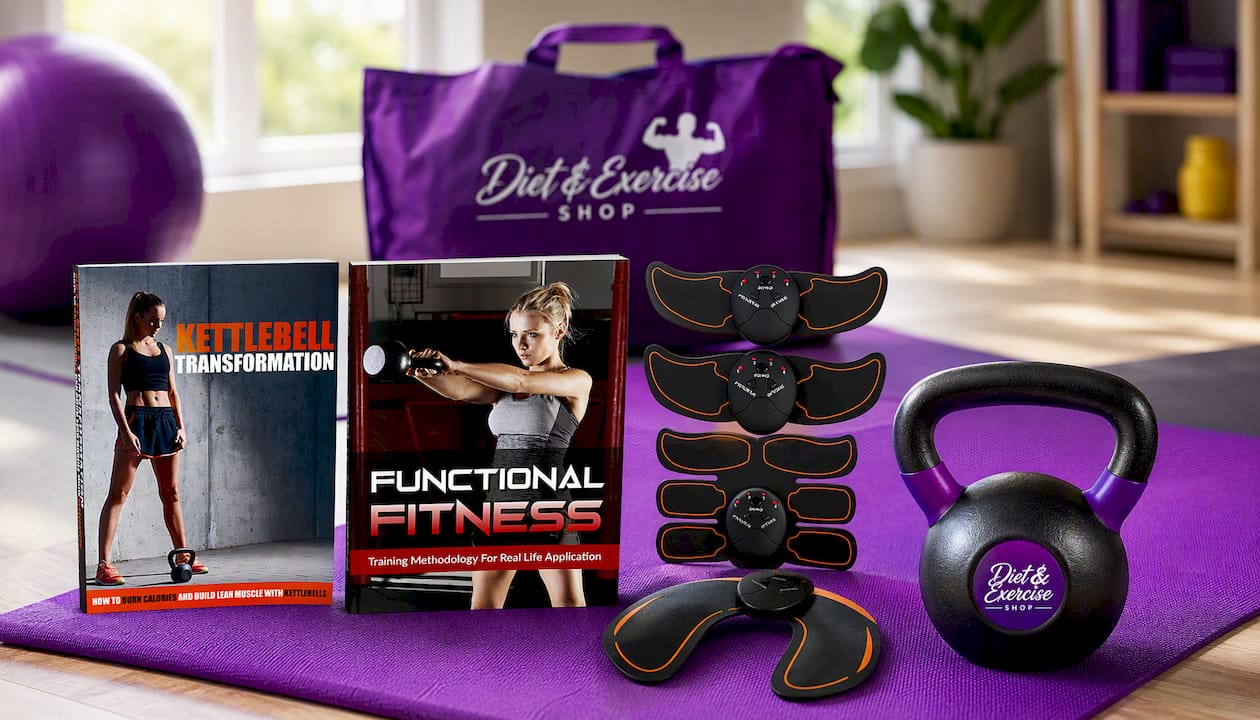
For someone more focused on mobility and everyday function than muscle size, the Functional Fitness eBook leans into home-friendly progressions built around exactly the squat, hinge, push, and pull patterns covered in this guide. And if you’re looking to round out a routine with some targeted core work between strength days, the Abs Stimulator is a low-impact accessory worth considering, though it’s a supplement to dumbbell training, not a replacement for it. Browse the full dumbbell workout plan collection to find the template that matches where you’re starting from.
Where This Guidance Comes From
- PMC peer-reviewed review on resistance training and older adults, for functional benefits.
- World Health Organization physical activity guidance, for population-level recommendations.
Talk to your doctor or a physical therapist before starting if you have existing joint, heart, or balance conditions.
This article is general information, not a substitute for advice from a qualified doctor. Consult a qualified healthcare professional about your own circumstances before acting on anything here.
Sources
- Verywell Fit — Strength training for seniors
- PMC — Resistance training and older adults (peer-reviewed review)
FAQ
What Weight Dumbbells Should a 70 Year Old Use?
Most people in their 70s starting out do well with 2 to 3 pound dumbbells for upper body presses and curls, per CDC guidance, and can often handle more for squats and deadlifts since the legs already carry body weight daily.
What Are Some Good Dumbbell Workouts for Seniors Over 70?
Goblet squats, seated overhead presses, supported rows, and calf raises cover the essential movement patterns and can all be done seated or supported for anyone with balance concerns.
How Many Days a Week Should a 70 Year Old Lift Weights?
Two to three non consecutive days per week, with 24 to 48 hours of recovery between sessions targeting the same muscle groups, matches CDC recommendations for older adults.
What Weight Dumbbells Are Recommended for Seniors Starting Out?
Start light, generally 2 to 3 pounds for upper body work, and increase by 1 to 2 pound increments only once you can complete your full rep range twice in a row with clean form.